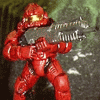
 Red
Vs.
Blue
 Red
Vs.
Blue
+
Warhammer 40k
Conversion Project 2006
Credit were credit is due (If you only care about how it was done, feel free to skip this section)
During the last month or so I started, and completed a "fan project". This was one of my first miniatures conversion/painting project I have done just for the heck of it, rather then for actual in game effects. A little background; for New Years we held a Halo LAN party at my local hobby shop (which is generally more focused on the board/table top games, rather then videogames). I brought Seasons 1-3 of RVB to entertain folks between matches or who weren't actually playing. Afterwards I lent them to a friend, and fellow gamer. When Ian returned them he pointed out quite casually that there were ten "guys" in RVB and you got ten Space Marines in a box.
And having had this suggestion made I was unable to resist the temptation. I rushed to finish my Tyranid army, by which I mean I took another 2 months to complete them. All the while planning and scheming how exactly I would convert the ten Space Marines into everyone's favorite Spartans stationed in a box canyon. In fact I've been so excited about this project I still haven't taken any decent pictures of my 'Nids yet. ):
The conversion is now complete, the models are painted, pictures are posted on my website and some people may want to attempt a similar project. If you are such a person, hopefully my experience in doing this, as laid out below, will enable you to do an even better job.
Ingredients (What you'll need to do this yourself)
* One Space Marine Tactical Squad $35
* Some modelling putty. I used GW's Green Stuff. $? I had some on hand.
* Bitz for weapons (see below)
Tools
* Dremel motor tool I used a cordless. You can certainly get by w/out it, but if you do much in the way of modelling I can NOT stress enough how useful one of these is. They used to be pretty damn expensive, but these days you can pick one up for less then $20 easily. I prefer a cordless... but recharging can be annoying.
* Hobby Knife AKA 'razor blade on a stick'
* Sculpting tool(s). I only had the basic one that GW puts out, but lots of
* Files/Sand paper (I mostly cheated and just used sanding attachments on my Dremel)
Assumptions:
Before you attempt something like this your self, please understand that I am making several assumptions in the manner I am writing this article. First off, and most importantly, I am assuming you have had SOME experience modelling, and know how to follow the directions. As such I'll be detailing were I departed from the instructions intentionally, but I'll leave most of the stuff that seems like common sense to me. Second I am assuming you have common sense and know basic things like "cut away from yourself" and "wear eye protection when operating motor tools" and "don't eat toxic substances". Based upon these assumptions I deny any liability for ANY and ALL injury you may incur while attempting to follow in my footsteps. If you do something stupid and get hurt, it's your own damn fault. Also I do not claim this is the "best" way to make Space Marines into Spartans. In fact I mention several possibly better ways you could go about things. If your attempt comes out better I'd love to see it, but if it comes out worse it's not my fault.
Assembly: Head
 I did the heads nearly last in the process, but considering you'll want to let
the green-stuff dry overnight probably, I'd suggest doing this first. I
certainly wish I had. I strongly recommend leaving the heads on the sprue for
both the "gouging" step and the green-stuff step. It will make it so much
easier, and also reduce the chances of dropping the heads and ruining works in
progress, or worse, losing the heads.
The first thing to do of course is drill out the faceplate. I used a Silicon Carbide Grinding Stone, which I have two of as one came with the Dremel, and one came with the "bits kit" I bought for it. I used this to basically gouge out the entire faceplate area. It's really not all that easy to see in this picture. I didn't worry to much about this part as I knew the visor that I'd be making out of green-stuff would largely conceal any mistakes I made here. Certainly start small, and then just keep gouging out a little more at a time until you get it right. It's better to take several passes and a little extra time, rather then going to far to start with and ruining the head. Fortunately the SMTS box comes with a couple of extra heads. So don't completely sweat it if you mess up.
Once this is complete it's time to use the green-stuff to add the visor. I'm going to assume you've had a little experience using green-stuff before. If you haven't the key things to remember are that water is good for preventing it from sticking to things, and it takes at least 4-5 hours to set, but becomes hard to work with within 20-30 minutes. (Also be sure to look elsewhere on the 'net for tutorials on how to use green-stuff if this is your first time.) I also ALWAYS find I mix together far too much of this stuff. Back on topic, mix together half as much as you think you'll need. For the helmet you'll want to roll a little pill shape apply it to the helmet about where it should be, then use your sculpting tools to get the shape right. If the helmets are still on the sprue this is much easier as you can brace the sprue and then use your razorblade and a sculpting tool at the same time to form the visor into the appropriate shape. Don't be afraid to experiment early. While the green stuff is still pliable it's not hard at all to fix mistakes, and you can hopefully learn what works and what doesn't on the first or second visor. Once I had the basic shape I used a razorblade to press in the two parallel marks on the visor and push the center bit aback. I recommend getting the basic shape first on all of them, then coming back and "detailing" the visors afterwards. This way the green-stuff will have started to set, but be relatively pliable still, meaning you can "deform" it to match the Spartan visor without making a mess slightly easier. Once you are satisfied make sure and place the sprues somewhere that they won't be disturbed, or touched overnight. Now is a good time to move onto the torso or legs.
Assembly: Legs
 One of the
biggest differences on the models between Spartans and Space Marines is the
legs. SMs have huge bell bottoms. They can get away with it, cause who's gonna
taunt an 8' tall guy in power armour with a gun whose barrel is the size of your
head? No one. However, Spartans do have more taste, and so we need to rectify
this. Without a Dremel tool, this is going to probably be the most difficult
part of the conversion. One possibility (if you've got plenty of spare cash) is
to get a box of Firewarriors, and use their legs (and arms) rather then those of
the Space Marines. If you opt for that route, I expect you'll want to put Space
Marine feet onto the Tau legs, as Spartans don't have hooves like the Tau. I
chose to use the dremel and an Engraving bit to remove the bell bottoms from the
models.
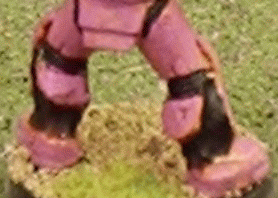
If I were to attempt this project again I would defiantly spend more time making the legs look good. Honestly I got overly excited and did a half-ass job of it. Basically just clearing out a "U" on the back lower half of each leg. A little more work, and possibly a bit of green-stuff could massively better results, or combining models such as Tau or Eldar bits. Regardless, even this less then perfect approached achieved pretty decent results. Some mistakes can be covered up a bit when you reach the painting stage, and in general you'll be displaying the models facing forwards, so even if you do decide to take a few shortcuts with this portion of the project, it certainly won't be all that noticeable.
Assembly: Torso
 The chest was the easiest part, as all I did was sand
off the chest insignia on the fronts. Again the dremel made this a breeze, but
it wouldn't be hard at all with just a regular file and a razorblade. For the back things weren't so simple,
though still by no means complicated. First take off the little "backpack
dimple" using the same methods. On the tops of the torsos there is a little
"collar ring" around the back of most of them. I removed this with a couple of
slices of my razorblade, as otherwise it would interfere with the shoulder
"bulges".
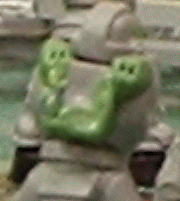
Next, a bit of green-stuff on the the bottoms of the backpacks. The Space Marines "backs" have a little V shape at the bottom, which is normally hidden by their actual backpacks. As we aren't going to be using them, we'll want to make the bottom square. This is definitely a good place to be a bit excessive with the green-stuff. We're going to want to sand the lower portion once the green-stuff is dry to make it relatively flat, so more is better then not enough as you can kind of see in this picture. Also there are often some dimples/depressions from poor molds in the backs as that part is usually covered by the Space Marine backpack, you'll want to fill that in with green-stuff. Spartan backpacks have a sort of Y shape at the top leading to the two "shoulder bulges" (for lack of a technical term). To make these I made a couple of small pill shapes, just a little bigger then the ones used for the visors. Stick them to either shoulder, being sure to leave enough room for the head, and mold them until they look about right. Then I used the tip of my razorblade to put the indentions in the front and back for the vents (or whatever those black bits are). This of course distresses the green-stuff requiring a bit of touching up, but it's not to hard to get it right. Now leave the torsos to dry over night.
Once the green-stuff has set, you will need to sand down the bottoms, and possibly other areas to make everything flat, and remove any lingering fingerprints.
Assembly: Guns
This part I'm going to be able to help you with the least, as all of the guns, aside from the pistols, were built from 3-7 different weapons. A lot of what you'll be able to do is going to depend heavily upon what bits you have available. If you've got friends who also play 40k, you'll definitely want to check with them and see if they have bits you can pilfer or trade for.
The rifles I came up with are honestly pretty crappy representations of the in game rifle, but about the best I could make with the bits I had available. They were done from the bodies of two Chaos Space Marine Bolters and an extra handle.
The sniper rifles were created from a Tau Pulse Rifle stock, the body of a Bolter (severely cut down), the scope from the SMTS sprue, some lengths of wire, and I honestly don't know what the muzzle of the rifle was from. It was just some bit I had in my bit-box.
The rocket launcher was made from part of the rocket launcher that came with the SMTS, a couple of Ork Sluggas, and a liberal application of green-stuff.
The laser sword was probably the most fun to make, and actually was from a small flying base. I certainly would not want to attempt to make it without access to a dremel. You'll definitely want to make it overlarge, as it will take a fair bit of sanding down to get it to the right shape, and then it'll shrink even further once you start buffing it to get it to look clearish again. Again you're on your own as far as finding the right bits for the "handle" of the sword.
Assembly: Putting it all together
Finally you can pretty much assemble everything aside from the laser sword before priming and painting. You'll probably want to hold off until you're nearly finished with tucker before gluing the sword on as otherwise you'll likely get paint all over it. One thing I really wish I had done was pick up a set of Warmachine Bases for the models. They certainly make the models look much more like they are a "display" if that makes sense.
The End ... Or is it?
Well, that wraps it up for this article. If you do attempt a similar project, I would love to see pictures and discuss any difficulties you had, as well as improvements upon the way I did things. If you have any questions about this please feel free to drop me an email (address is webmaster@thissite).
Further escapades could well include: Making Sheila, Vic, the Puma, Andy (too easy), as well as converting up some Covenant or Flood, possibly for use in creating a homebrew Halo tabletop game.